Implementing HubBox via Google Tag Manager (GTM)
This guide explains how to implement HubBox pickup point selection on your website using Google Tag Manager (GTM). This approach is intended for websites or ecommerce platforms where direct access to modify checkout page code is not available. GTM allows you to inject the HubBox Tag onto the page without modifying the underlying platform.
For full details on the HubBox Tag, refer to the Tag documentation.
Tag documentation
How It Works
GTM is configured to insert and execute the HubBox Tag script on your checkout pages. When triggered correctly, the script loads the HubBox pickup point selection interface, allowing customers to choose a collection location during checkout.
Prerequisites
| Requirement | Details |
|---|---|
| Active GTM container | Correctly installed and firing on all relevant pages, including the full checkout flow |
| GTM permissions | Sufficient access to create tags and triggers and publish changes |
| HubBox Tag script | The JavaScript snippet provided by your HubBox Integrations Manager |
Obtain Your HubBox Tag Script
Access the Tag Script
Before working in GTM, ensure you have the correct HubBox Tag script from your HubBox Integrations Manager. This unique JavaScript snippet initialises the HubBox service, renders the pickup point selection interface within your checkout, and handles the selection process.
You can access the Tag script via Console by going to "Setup" and then "Tag Management" in the menu.
Create the GTM Trigger
The trigger tells GTM when and on which pages to execute the HubBox Tag. The goal is to fire it on your checkout page(s) once the main page elements are ready.
Window Loaded Trigger (Recommended)
The Window Loaded trigger waits until the browser has finished loading all page content, including scripts and images. This ensures the elements HubBox needs to interact with are available before the tag fires.
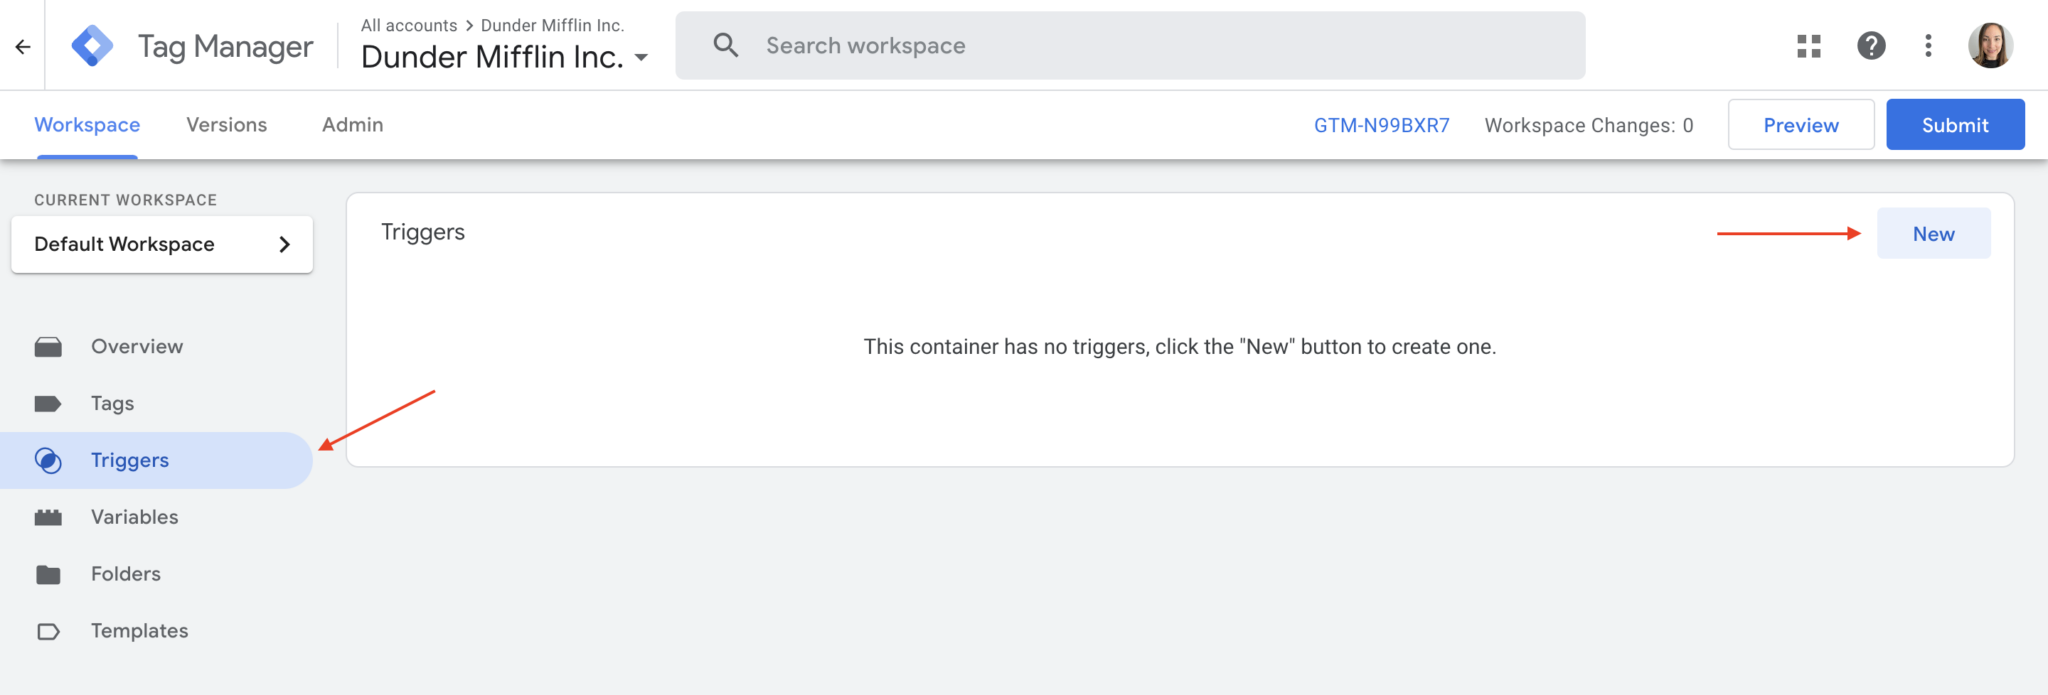
Open Triggers
In your GTM workspace, click Triggers in the left menu, then click New.
Name the Trigger
Give your trigger a descriptive name, for example: HubBox - Trigger - Checkout Window Loaded.
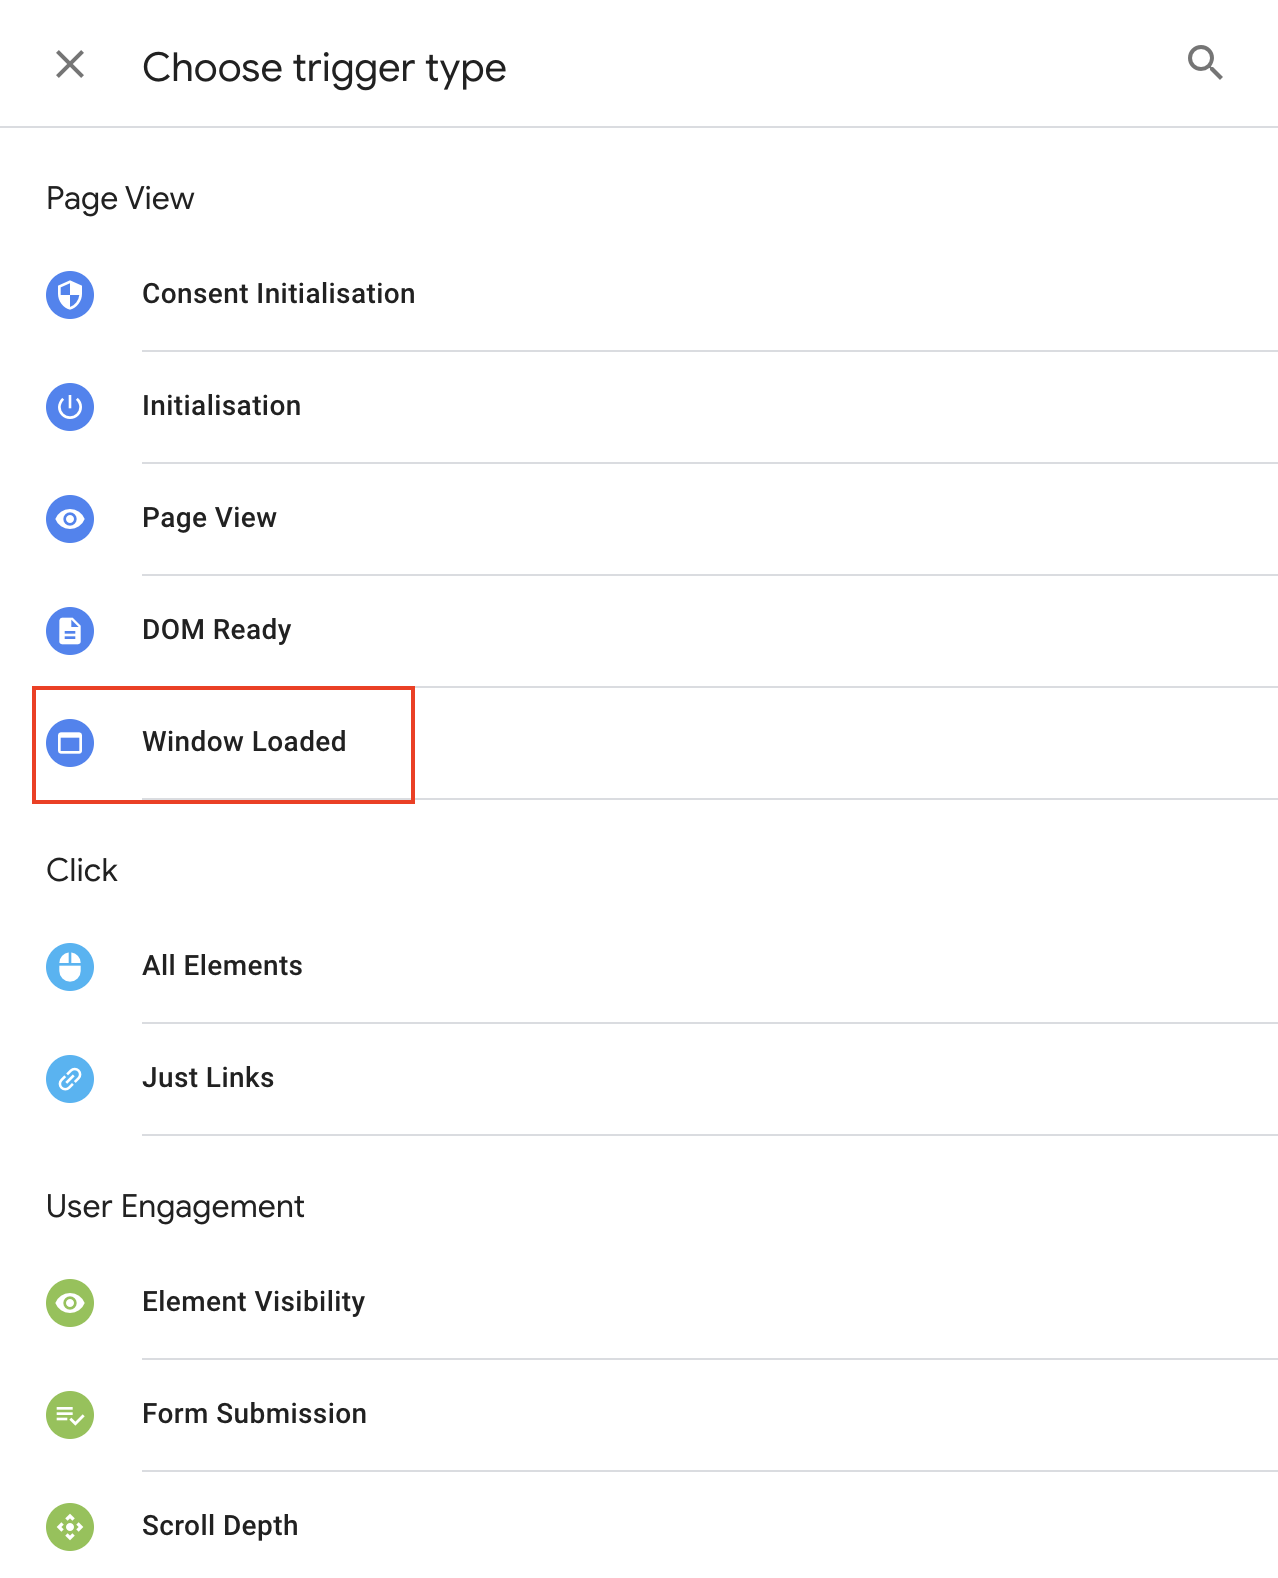
Select Trigger Type
Click the Trigger Configuration box and select Window Loaded.
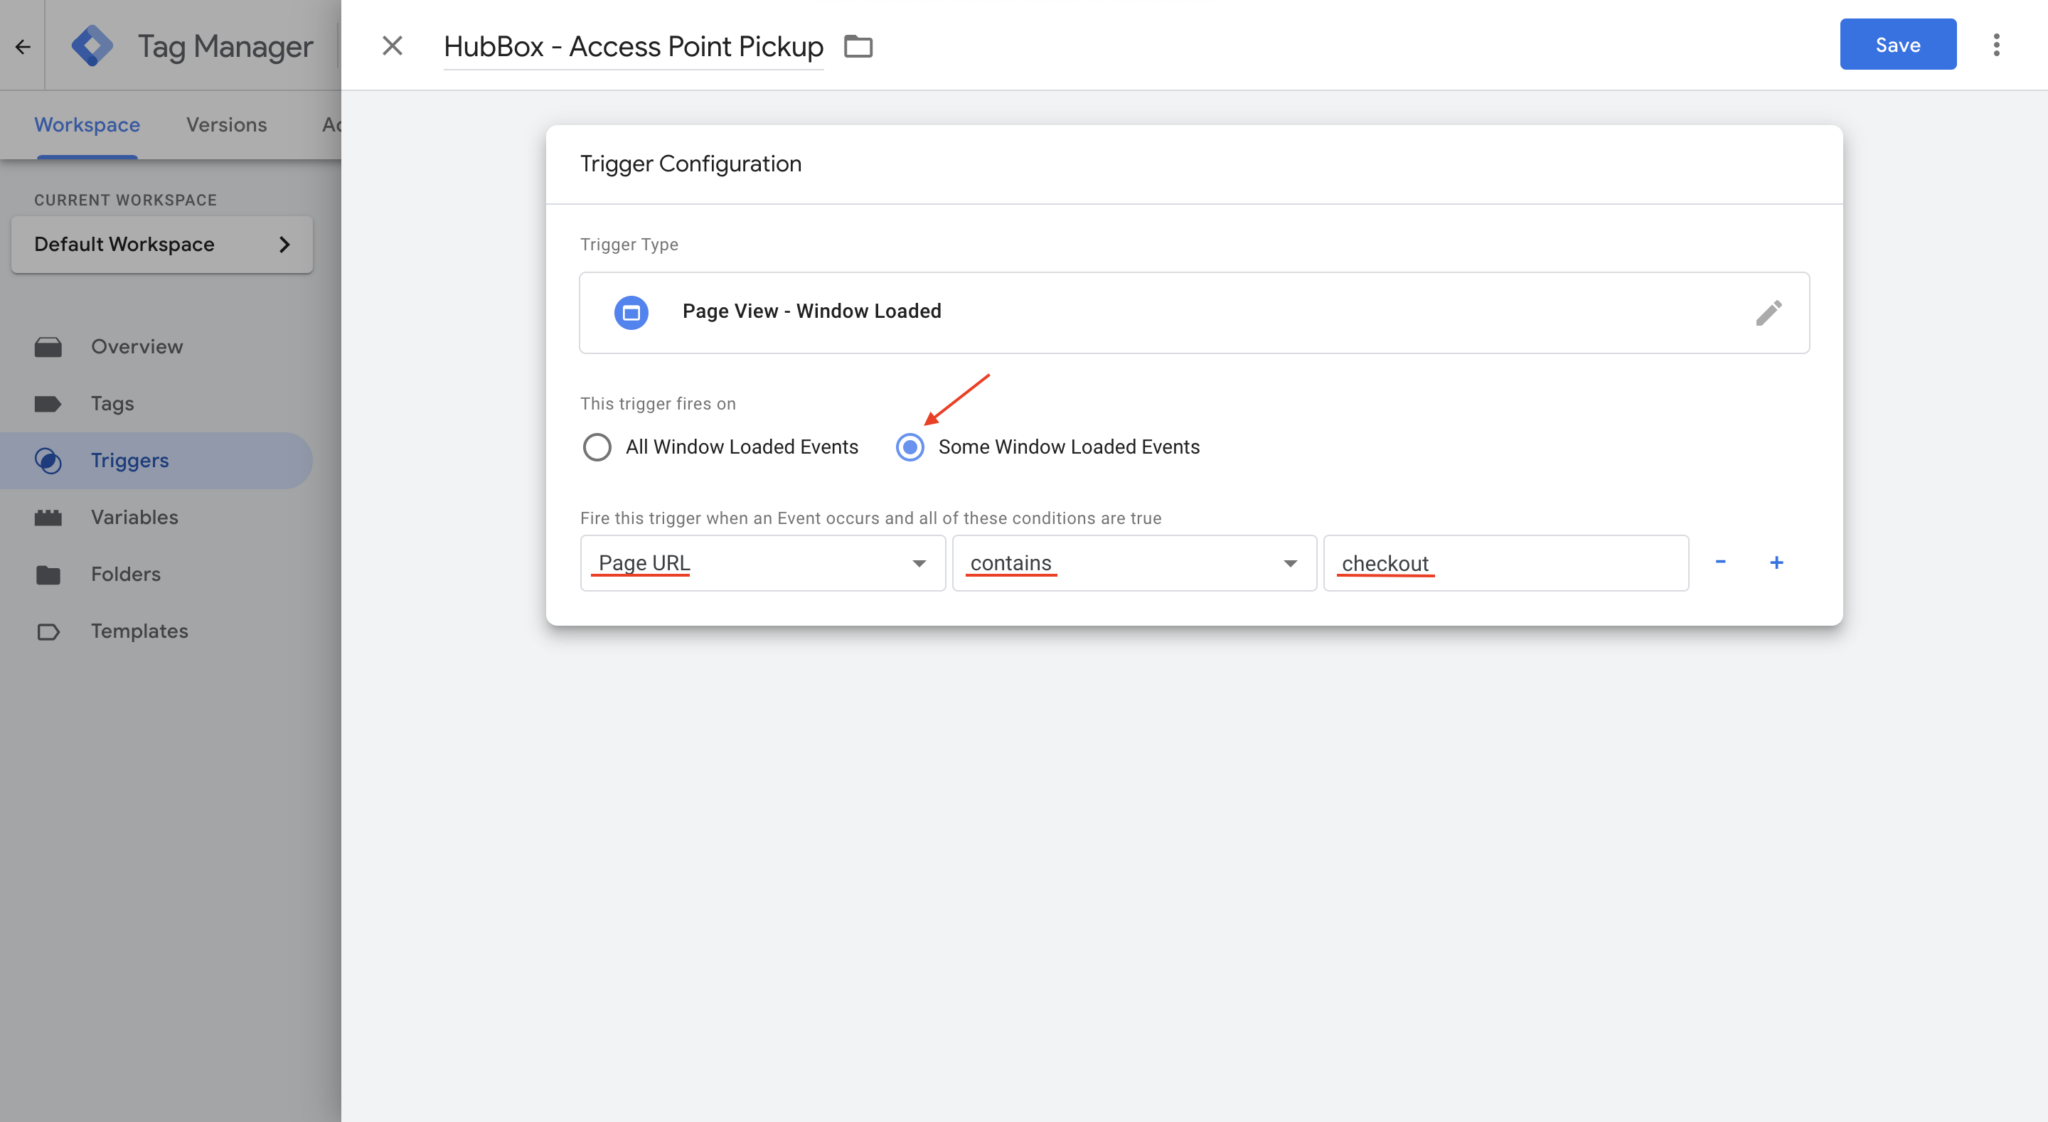
Scope to Checkout Pages
Under This trigger fires on, select Some Window Loaded Events. Configure the condition to target your checkout URL(s):
- First dropdown:
Page URL - Second dropdown:
contains(ormatches RegEx,starts with, depending on your URL structure) - Value: A unique part of your checkout URL, for example:
checkout,/store/checkout, ororder/shipping
Save
Click Save.
Trigger Considerations
URL matching is too broadIf the word checkout appears elsewhere on your site where you do not want HubBox to load, use a more specific condition. For example: Page Path starts with /checkout/shipping.
If your checkout is an SPA where the URL does not fully reload between steps, the Window Loaded trigger may only fire once on initial page load. In this case, consider:
- A History Change trigger to detect URL changes within the SPA.
- A DOM Ready trigger if the required elements are available earlier.
- Custom Events pushed to the GTM data layer by your application when specific checkout steps load.
Consult your development team or GTM documentation if the Window Loaded trigger proves unreliable for your setup.
HubBox UI appears too late on the pageIf Window Loaded causes a noticeable delay before the HubBox UI appears, you can experiment with the DOM Ready trigger instead. However, ensure all elements the HubBox script depends on are present in the DOM at the point the trigger fires.
Create the GTM Tag
The tag holds your HubBox JavaScript and links it to the trigger created in Step 2.
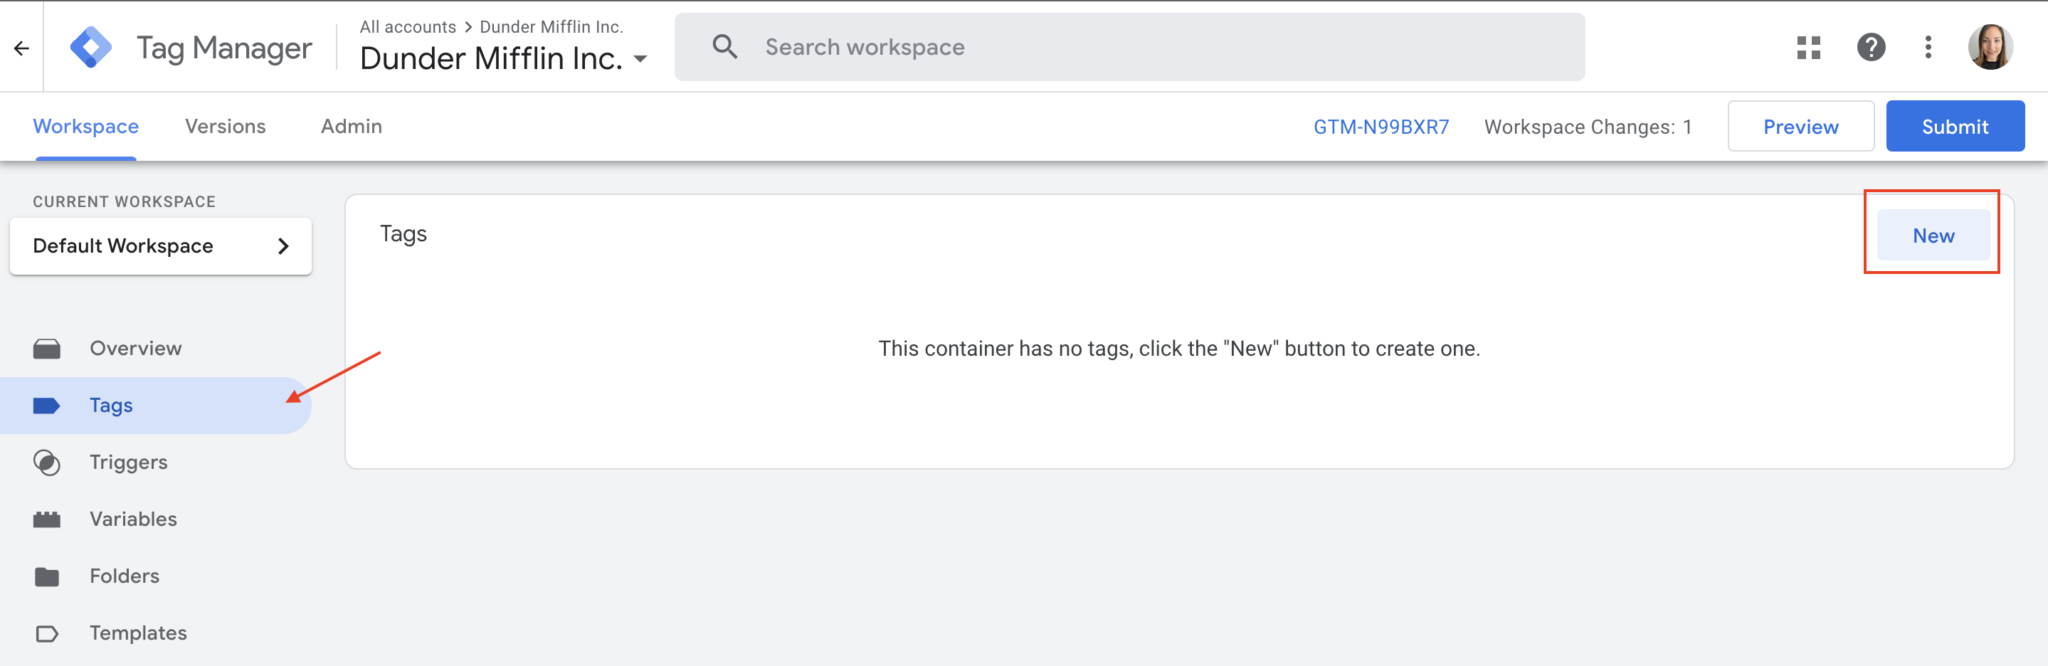
Open Tags
Click Tags in the left menu, then click New.
Name the Tag
Give your tag a descriptive name, for example: HubBox - Custom HTML - Load Widget.
Select Tag Type
Click the Tag Configuration box and select Custom HTML.
Paste the HubBox Script
Paste the entire HubBox Tag script (obtained in Step 1) into the HTML text area. Copy and paste it exactly as provided — do not modify the script.
Assign the Trigger
Click the Triggering box and select the trigger created in Step 2 (e.g., HubBox - Trigger - Checkout Window Loaded).
Save
Click Save.
Preview, Test, and Publish
Thorough testing before publishing is essential when injecting scripts into a checkout via GTM.
Testing in Preview Mode
- In the top right of your GTM workspace, click Preview.
- Enter your website's URL and click Connect. A new tab will open with the GTM debug panel visible at the bottom.
- Navigate to your checkout page(s).
- In the GTM debug panel, select the Window Loaded event (or your chosen trigger event) on the left. Confirm your HubBox tag (
HubBox - Custom HTML - Load Widget) appears under Tags Fired.
Verification Checklist
- UI Rendering — Does the HubBox pickup selection interface appear correctly on the checkout page, without excessive delay or layout shift?
- Widget Functionality — Can you open the map widget, search for locations, and select a pickup point?
- Address Update — After selecting a pickup point, does the shipping address update correctly to reflect the chosen location?
- Browser Console — Open your browser's developer tools (F12) and check for JavaScript errors, particularly from the HubBox script or GTM.
- Cross-Browser and Device — Test on Chrome, Firefox, Safari, and Edge, as well as desktop, tablet, and mobile viewports.
- Conflict Testing — Test with different checkout scenarios: guest vs. logged-in, different payment methods, and other active GTM tags.
Publishing
Once you are fully satisfied with testing in Preview mode:
- Click Submit in the top right of your GTM workspace.
- Provide a descriptive version name and description, for example:
Added HubBox Tag for Pickup Points. - Click Publish.
The HubBox Tag will now be live for all users.
Expected Outcome
Once the HubBox Tag is correctly implemented and published via GTM:
- Customers visiting your checkout page(s) will see the HubBox pickup option within the checkout flow. The exact appearance depends on your HubBox configuration.
- Selecting the pickup option opens the HubBox map or list interface, allowing customers to search for and select an available collection location.
- Upon selecting a location, the shipping address associated with the order is automatically updated to the address of the chosen pickup point.
- The customer can then complete checkout as normal with the pickup location set as the destination.
Troubleshooting
Tag is not firing- Open GTM Preview mode and navigate to the checkout page.
- Check the debug panel to see which events fired and whether your trigger condition was met.
- Compare the actual page URL against the condition you configured. Ensure the URL string or regex matches exactly.
- Confirm the GTM container snippet is correctly installed on the checkout page by inspecting the page source.
- Open the browser developer console (F12) and check for JavaScript errors.
- Confirm the HubBox Tag script was pasted completely and without modification.
- Verify you have the correct and most recent script from your HubBox Integrations Manager.
- Check that the trigger is firing at the correct point in the page lifecycle (see trigger considerations above).
This is typically a trigger timing issue. Try the following:
- Switch from Window Loaded to DOM Ready and test whether the required page elements are available at that earlier point.
- Use GTM's tag sequencing feature to ensure the HubBox tag fires after any other tags that modify the checkout DOM.
- If using an SPA, investigate whether a History Change or Custom Event trigger provides more reliable timing.
This is most likely a script or configuration issue rather than a GTM issue. Confirm:
- The HubBox Tag script is complete and unmodified.
- Your HubBox
configIdis correctly set within the script. - There are no JavaScript errors in the browser console at the point of selection.
Contact HubBox support if the issue persists after verifying the above.
HubBox conflicts with other GTM tags or checkout scriptsUse GTM's tag sequencing or tag pausing features to isolate the HubBox tag and identify conflicts. Test with other tags paused to confirm whether the issue is caused by an interaction with another script. If a conflict is identified, adjust the firing order or consult your development team.