HubBox Integration for Shopify (Basic & Advanced Plans)
Welcome, Shopify merchants! This guide walks you through integrating HubBox pickup point services into your store using the official HubBox Local Pickup Shopify App, designed for stores on Basic, Shopify, and Advanced Shopify plans.
For plans beneath the Advanced tier, you will need to ensure that Carrier Calculated Shipping (CCS) is enabled, as this is required for the HubBox integration. Enabling CCS may incur an additional charge. Please speak to Shopify directly to confirm whether this functionality is enabled on your account and for more information on costs.
View HubBox on Shopify App Store
Key difference from Shopify Plus: Stores on Shopify Plus have access to Shopify's Checkout Extensibility, which allows deeper checkout customisation. This guide covers the Basic and Advanced plan integration, which works by configuring new Shipping Rates for pickup services rather than modifying the checkout UI directly. For Shopify Plus integration details, see the Shopify Plus documentation.
Prerequisites
Before you begin, ensure you have the following:
- A Shopify store on a Basic, Shopify, or Advanced plan.
- Carrier Calculated Shipping (CCS) enabled on your account.
- Admin access to your Shopify store.
- An active agreement with the HubBox Sales or Integrations team to license your account within the app.
How It Works
Installation & Configuration
Unlike Shopify Plus, this integration uses Shopify's built-in Shipping Rates functionality:
- You install the HubBox Local Pickup app from the App Store.
- Within the app's admin panel, you configure which pickup networks (carriers) you want to offer and set up corresponding Shopify Shipping Rates (e.g., "DPD Pickup Point - Next Day", "DHL Parcel Pickup - Express", or "UPS Access Point - Standard").
Checkout Process
- A customer enters their shipping address at checkout.
- Shopify requests available shipping rates for that address based on your Shipping Zones.
- The HubBox app (using Shopify's Carrier Service API) identifies eligible HubBox pickup services for that address.
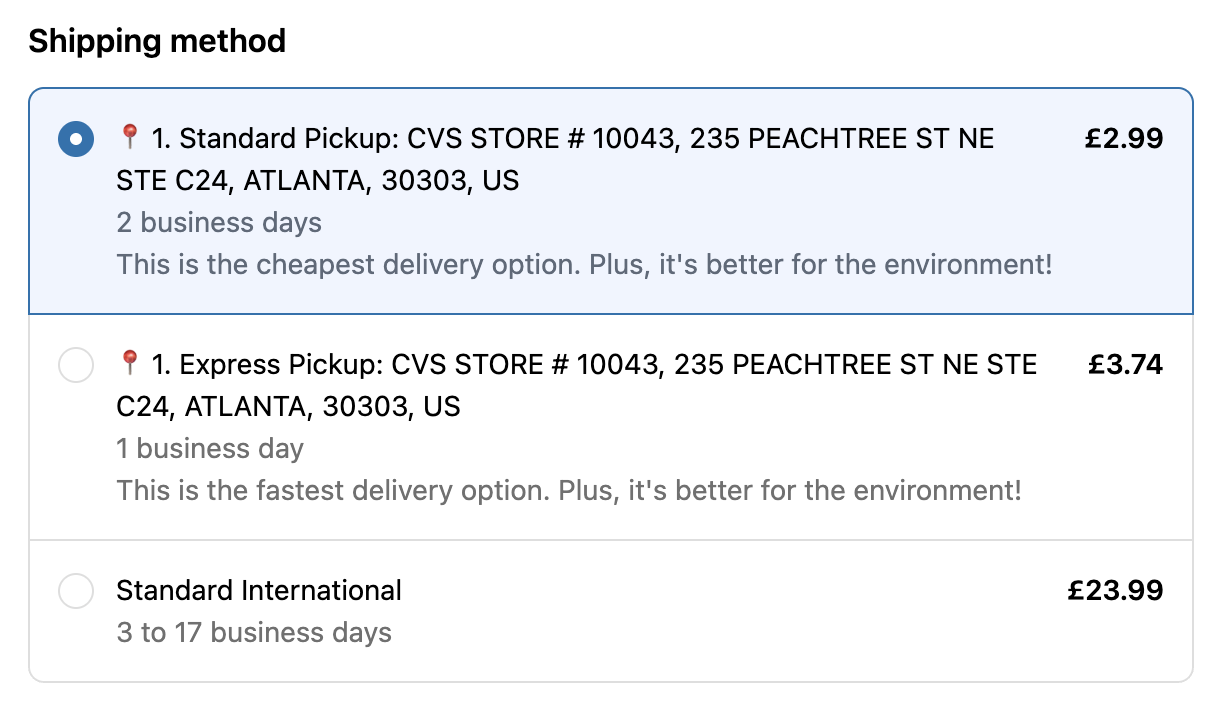
- The configured HubBox pickup rate(s) are returned and displayed alongside your existing home delivery rates in the standard Shopify shipping methods list.
- The customer selects the desired pickup rate (e.g., "DPD Pickup Point", "UPS Access Point", "DHL Parcel Pickup") just like any other shipping option.
Order Processing
After the order is placed, the HubBox app automatically adds specific tags and note attributes to the Shopify order to identify it as a pickup order and record the chosen location. The shipping address is updated to match the selected pickup point address.
Installation & Initial Setup
Install the App
- Go to the HubBox Local Pickup page on the Shopify App Store
- Click Add app or Install.
- Follow the prompts in your Shopify admin to grant the necessary permissions and complete the installation.
You may see an option to set up a subscription during installation. Please do not follow this process — HubBox will enable your access to the app directly without requiring this step.
Account Licensing & Activation
- New HubBox Clients — If you have not yet finalised terms, contact the HubBox Sales team.
- Existing Agreements — After installing, the HubBox Integrations team will reach out to activate or "License" your account within the app's backend, enabling full configuration access.
You generally cannot fully configure or launch the app until your HubBox account is linked and licensed by the HubBox team.
Configure Shopify API Access & EventBridge Integration
For the HubBox app to add identifying tags and pickup details to orders after they are placed, it requires secure access to your Shopify Admin API and a connection to Amazon EventBridge for real-time event notifications. Your HubBox Integration Manager will set up your EventBridge integration.
Configuring the HubBox App
Once the app is installed and your account is licensed, navigate to Apps > HubBox Local Pickup in your Shopify Admin to open the HubBox App Admin Panel.
Configure the following sections:
| Admin Panel Option | Description |
|---|---|
| Select Courier Service | Choose which carrier networks (e.g., UPS, DPD, DHL) to offer for pickup. |
| Change Region | Select the geographic regions or countries where these services should be available. |
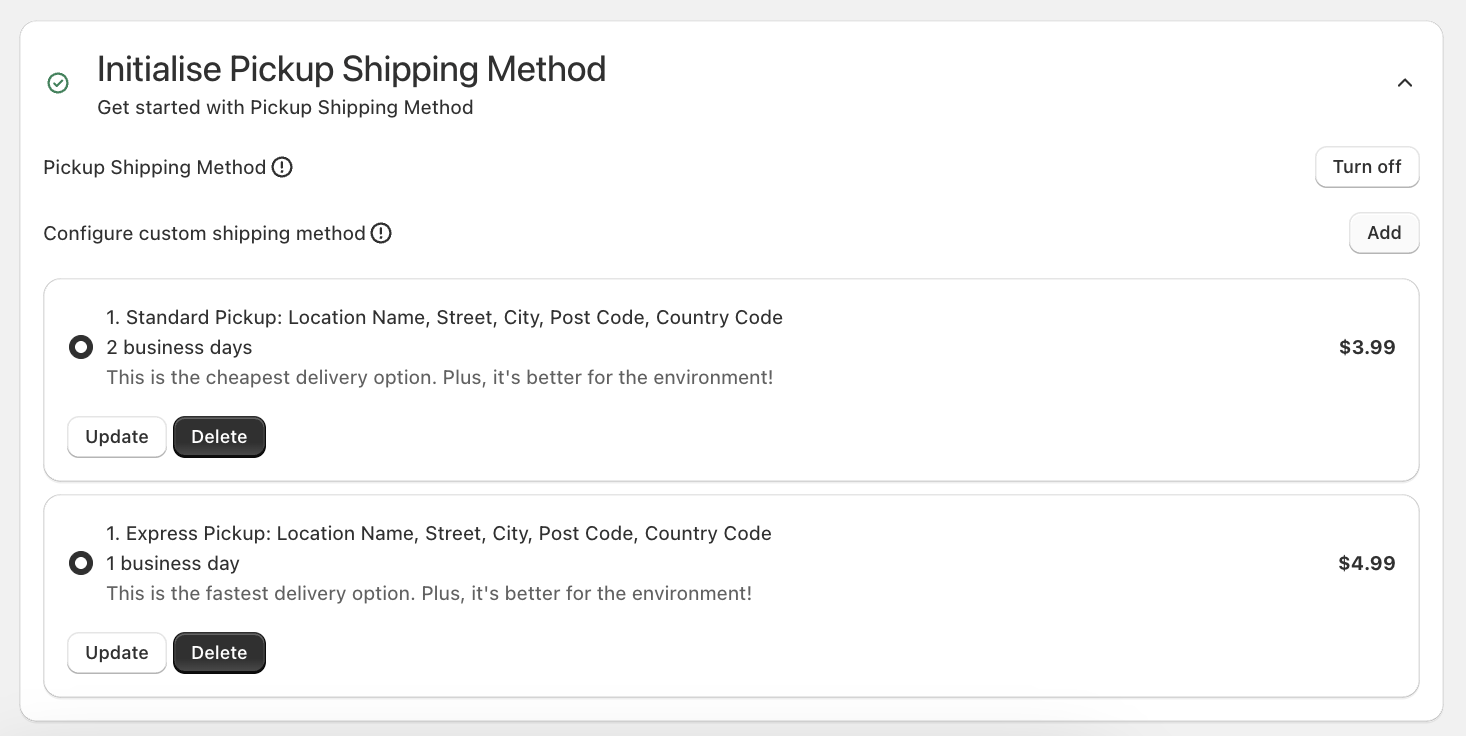
| Initialise Pickup Shipping Method | Turn on to enable the HubBox app to present pickup shipping methods. |
| Configure custom shipping method | Click Add to configure a custom shipping method and create new pickup shipping rates. |
| Additional Settings - Orders Token | Paste the orders token generated in Step 3. |
| Additional Settings - Payment methods filter | Install if required to hide the pickup option for certain payment methods (e.g., Apple Pay, Shop Pay, Klarna). |


Handling Product Eligibility
Unlike Shopify Plus, Basic/Shopify/Advanced plans have limitations on modifying checkout logic directly. This means the standard HubBox app for these plans can be more limited than for Plus sites. Bailout logic can be added to hide the pickup point rates based on cart value and cart weight.
Speak to your HubBox Integration Manager about any required product exclusions and they will work with you to identify any workarounds.
Testing the Integration
After installation and configuration, thoroughly test the setup before going live.
- Place Test Orders - Use test orders with addresses within the Shipping Zones where you have enabled HubBox pickup rates.
- Verify Rate Appearance - At the shipping methods step of checkout, confirm that your configured HubBox pickup rates (e.g., "DPD Pickup Point", "DHL Parcel Pickup Express", "UPS Access Point Standard") appear correctly alongside your standard home delivery rates for eligible addresses. Check naming and pricing.
- Test Selection & Checkout - Select one of the HubBox pickup rates and proceed through the full checkout process to confirm it completes successfully.
- Check Order Data in Shopify Admin - After placing a test order, go to Orders in your Shopify Admin and find the test order. Verify the following:
- Tags — The correct carrier tag has been applied (e.g.,
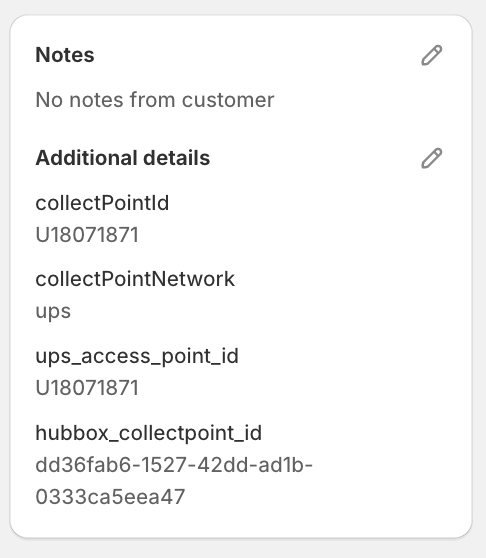
UPS Access Point,DPD Ship to Shop). - Note Attributes / Additional Details — A note attribute (e.g.,
collectPointId) has been added containing the unique ID of the chosen pickup location. - Shipping Address — The shipping address on the order has been updated to the selected pickup point address.
- Tags — The correct carrier tag has been applied (e.g.,
How Pickup Orders Appear in Shopify
When a customer checks out using a HubBox pickup shipping rate, the HubBox app automatically updates the order in your Shopify admin:
- Shipping Address — Updated to the address of the selected pickup point.
- Tags — A carrier-specific tag is added to identify the order (e.g.,
UPS Access Point,DPD Ship to Shop). Use these to filter and identify pickup orders. - Note Attributes (Additional Details) — The unique location ID for the selected pickup point is added as a note attribute (e.g.,
collectPointId). This is used by your fulfilment team or systems to identify exactly which pickup point the parcel should be sent to.

Use this combination of updated shipping address, tags, and note attributes in your fulfilment workflow to correctly process HubBox pickup orders.